Friday 21 August 2020

Through the looking glass

 Yep, windows was top of the to do list. Started the rear window, which was fun. The rubber seal kind of went straight on, but of a faf. Was a fiddle to get it on and the C pillar trim needed trimming back from the window opening just a smidge. I had seen some one struggle because of the opening not being big enough because of this, so cut to the chase and sorted that before it was a problem. With a lot of lube the glass was teased in ok, then it was time to fit the beading. I had bought the special tool to do this and set at it. It really didn't want to seat right at the start, several attempts and I decided I would just have to go back to it and flick the rubber fully round it later. I did the first corner surprisingly easily, then upto the next and that went well. Then along the top edge of the window .... the bead would just not sit right. Forwards then backwards and then I realised the tool was just moving so slowly ....  I gave up/paused for the day. Tennis elbow was kicking in. I had been bracing mt self against the side of the garage whilst fitting the bead. Yes it was being that stubborn.

Under advice I added lube to the bead channel in the rubber the next day. So much better, still not a fast job as the bead needs to sit just right. Managed to trim the bead to just over length to allow for shrinkage and popped that in. I went back the the starting piece, hmmm that didn't quite go according to plan. It started ok flicking the rubber around the bead, then I slipped and run the screwdriver down the car! A lovely stripe of primer revealed, sigh... later for that job!

Have a look here for a few do and don'ts on fitting the glass. Video

The next stint was on a side window, went in nicely and then the I did a dry run for closing it. I know with new seals this can be a pain, just couldn't get the window closed and the catch to be sure of where to pierce the new C pillar lining for the catch fixing holes. So paused for advice and reference from the club.

With a nice ref picture from Emma (she has been a great help with knowledge and ref pictures) I tried again. Still not quite happy the seal was peeled back and I measured the fixing holes in the body work, put it back together and went for it. Which worked out nicely.


In between the pauses on that side window I tried to get the drivers one to the same stage. The bloody metal frame on the window had come away from the glass and made the outside diamond shaped compared to the opening. So that was cleaned up, glued and clamped.

Today that one went in and fairly quickly for a change, oh and I clipped the sunroof in some time between the side window stages.

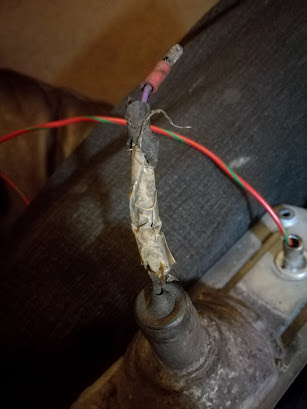
Talking of which, in another moment when I was avoiding the side windows I fitted the front headlight bowls and lights, also managed to get one side light/indicator in as well. Sounds easy, I had to re wire the indicators due to only have 1" long wires before they where joined with another bit of wire. Hmmm that join by the way, was just the wires twisted together and that was mo way close to good enough. Managed to get the bulb fixing out and replaced the wires so they where new and long enough to reach the main loom. Really liked the prep when I was fitting them, nice clean wires and ages ago I had replaced the fixing bolts for marine grade stainless steel bolts :) there is a little fiddling still to do where the light wires join the main loom, but I have a clear plan and the work wont look out of place. Even managed to keep the same coloured wires again with identical connections. Will be wiring up so both side lights work but in a way they can be easily disconnected and worked on. You will see about the "both" when I test the lights (round nose lights but a clubman has separate side lights).


Tonight I sucked it in and repaired that scratch, sadly I think I have a better shine on the repair clear coat than the original one, so a bit of polishing to try and blend that some how. No picture as my phone was dead and charging.

Getting there as I'm not completely sure of what the next step is, a couple of small bits on the to do list but thats all at the moment.

Suppose it is either sort the dash switch panel out, fit the front screen or fit the door glass and hardware to get them on the car and out of the way. I colour coded the hinges a few weeks back so should be "just" add the fittings and buy new nuts and shims to fit them. Front suspension change after that !! That prob would put me on or very close to engine after that, eeek, that might be a glimmer of light at the end of the tunnel!!

Sunday 9 August 2020

Snagging

Again there was a few little bits that had appeared on the to do list.

While I was trying to work out how to solve the cotton real mounts for the gear selector linkage so the carpet could go down. With out paying more in postage than on the parts.  I went through the bundle of new parts that had turned up, which yes, I had forgotten to add some cotton real mounts. One of the parcels was seat belt bolt covers. I found a place for these standard covers and ordered 6 for less than I could buy 2 from a mini specialist. Subtle, but a nice touch for just a few £ and a very quick straight forward job 


 I decided to mount the accelerator pedal and steering column as I had put a new ignition barrel in, all posh now with a key and painted/cleaned up! Also really getting annoying with it being on the dinning table for over a week! All went well and I managed to line up the pinch bolt on the column to the steering rack, then I broke the weld where a patch was nibbled by a grinder from the previous owner of said bracket (from the dash, and it isn't made any more). Looks like that will be coming back off for a proper go at welding it back, it really isn't much but it should be done. I did add some carpet around the column base, as it had been cut quite generously. The off cut from the speaker cut out on the parcel shelf worked a treat.


For the last few days the garden has been covered in windows and a front grill. It's really looking like I have a problem, parts all round the house and all over the garden as well as in the garage and loft!

I wanted to double check the glass and start cleaning them up ready to re tint some of them, as the tint had turned up this week. But by then I was gearing up for a parts run, so window tinting was put on the back burner. 

Earlier this week I had checked the budget/funds, I knew that I should be getting the engine sent off for rebuild while I finish the rest of the car. With a fairly large and uncertain bill for that and knowing I still needed to buy the correct wheels, tires, coil, starter solenoid and almost definitely some other parts as well. The sums took me way over what was left in the kitty. The straight forward plan was finish off the interia, fit up the doors, refurb and swop over the front hubs/suspension and put the cover over it till the savings where better. Option B was suck it in, go for a smaller and cheaper engine. From day one, all I was interested in was the 1275 but that was looking like adding at least another year. Option B stands a chance of the mini being done this year though so I started looking around.

Having tracked down the family tool club engine hoist and arrange loan of a small van. I got my sheets and lifting strops, got some food and drink ready to get the latest round of parts .... a 998cc engine from a chap who races minis and some other bits as it was a job lot.

Yesterday was very hot. Was smug we set off early to Salisbury for those parts, but getting back after lunch and unloading the engine at my parents and then 2 sets of alloy wheels, a clubman bonnet and a pile of old bumpers at home. Yes I still have a set on the car which are only on it so it can be moved and another set (of 3!) In the garden. I just didn't have it in me to work on the mini with all that in the morning and the heat. Sitting under the sun umbrella washing a set of wheels and listing them I did manage. Finally a bit of money back into the pot and a local mini owner very happy with his bargain.


I will try again to tint the rear window today so it can be fitted .... off the shelf, out of the way and another job done. Well that's the plan ?


Saturday 1 August 2020

Last of the cabin carpet

Last night the clear coat on the switch panel bezel was done and carbon wrap also done on he switch panel.

Attacked the accelerator pedal mounts today. One if the captive bolts had been sheared off with just a little stub left there. Out came the die again to clean up the thread on the good bolt, dropped the pedal bracket over the 2 bolts and then .... drilled a extra hole so I can fit a special bolt to make sure it can.not twist. Then it was spotted I must have sprayed the pedal from the back leaving a patchy coating on the front. That was hung up and sprayed while I got on with contemplating the last bit of cabin carpet.  This bit goes on the bulk head but still under the dash. Did I say the last bit ? Or so I thought when I first went in the garage.
Whilst doing that I had a good stare at the cross rail on the floor pan (where the standard front seats mount and hinge from). Yes, it seemed a waste to not template the exposed bit of the cross member while I had all the materials out .... why stop there when there is nothing under the hand brake handle as well.
Several templates later I was set to cut up more carpet and glue that on. Worth it as it would have bugged me later on.

Talking of possible regret, the front carpet came out to keep it clean with this round of glueing. The cut right in the middle that would prob be hidden by the heater, had opened up again. The gaffa tape was a bit hopeful for holding it together , so while it was out plan B was executed. A hessian sack a nabbed was cut up, contact glue applied to both and slapped it over the cut. I really could not work out why the previous owner had done it.

Now feeling confident the carpet will lay nice and flat now, and kind of waiting for the parts to turn up for the next round.